

This summer has been the season of making flowers out of wonderful materials, and none better than with fabric-especially burlap! Oh how I've been turned onto burlap, and how I've been without this material for my entire life, a sad fact until lately!
I made the burlap roses after being inspired by a few fabric rose tutorials, and went to town without taking pics for a tutorial. So, I came across a sweet deal at Joanne's Fabrics on denim, and decided to make fabric rosettes with this equally amazing and rustic material!
Here's the tutorial on making roses, with any fabric:
Tools:
Fabric: Burlap, Denim (I get by the yard-tons of uses left over)
Scissors (Fiskars is the best for fabric cutting-so I'm told, and I agree)
Yardstick/Ruler

Step 1:
Layout your fabric, measure out 1 1/2" x 30" of fabric, and carefully cut away. I folded my piece of denim in half, so I had 2 strips when I cut this piece.

Step 2:
Fold your strip in half, lengthwise.

Step 3:
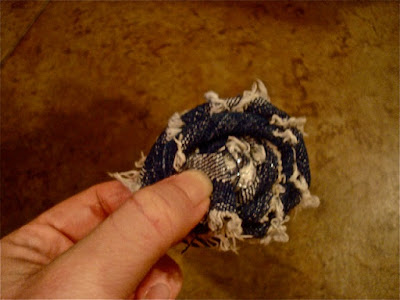
Take the end, and being rolling it down-this will create the center of the flower.
Oh, by the way did you notice the little tail at the upper right corner of the pic? Yes, I had company while I made this pictorial, her name is Lilu, our puggle!

She has no idea what I am doing, and is so interested in figuring it out! Her face says she is super curious! Anyway, continuing, with Lilu's help...

Step 4:
Once you have rolled a bit to create a pretty tight center, let your material unravel.

Step 5:
Begin twisting the unraveled fabric below the little bud you've created.
Tip: At this point, I have to be honest with my little tip-I placed the end of the twisted fabric under my foot to hold the fabric taught, while I created the flower. I would show this, but my feet are in need of a pedicure-but it worked like a charm and helped so much! Such a savvy little multi-tasker am I! :)

Step 6:
Begin gently rolling your bud along the twisted fabric, making sure each row stays right inline with the previous. This is why I say "gently", because you don't want to be quick with making these cuties, take the time to make sure it's creates a well formed flower.

Step 7:
When you come to the end of the fabric, leave the last inch or so unraveled, this will be the part to secure your little rosette.
Step 8:
Flip over your bud, add a glop of the Amazing Goop to the center of the flower, and securely place the left over piece of fabric to the goop.
Tip: I love Amazing Goop! It is one of the best adhesives, especially when it comes to crafting. I am not a sewer, and I love being able to create no-sew projects. If you haven't tried Amazing Goop yet, you will love it! It does leave a sticky residue on your fingers, which can wash off with warm water and soap, by the way.

Et voila! You have a cute little fabric bud ready to be used for whatever purpose! As this is a bridal blog, adding fabric flowers to your wedding decor will instantly make any object charming. Add them to your table number frames, dress up your chair sashes, even add them to your gown or accessories!

What I like about using burlap & denim, they are classic and look rustic. I am enamored by rustic inspired weddings & home decor-rustic not in the cutesy way, but in a way that is natural and holds it's own charm on it's own.
Are you inspired to create fabric roses? Please share with us your creations, we'd love to see them!
Happy crafting!
No comments:
Post a Comment